Imagine having a bountiful harvest right in your own backyard, and being able to enjoy the fruits of your labor long after the growing season has ended. With urban gardening, you can turn your small space into an oasis of fresh produce, all while preserving the flavors and nutrients for months to come. In this article, we’ll explore the fascinating world of canning and fermenting, two time-honored techniques that will empower you to make the most of your urban garden and savor the goodness of homegrown goodness all year round.
Benefits of Urban Gardening for Food Preservation
Access to Fresh, Organic Produce
Urban gardening offers the opportunity to grow your own fresh and organic produce right in the heart of the city. By having your own garden, you can ensure that the fruits and vegetables you consume are free from harmful pesticides and chemicals. This allows you to have more control over the quality of your food, providing you with peace of mind and the reassurance that you are nourishing your body with wholesome, nutritious ingredients.
Reduced Food Waste
One of the major benefits of urban gardening for food preservation is the significant reduction in food waste. When you have your own garden, you can harvest the produce when it is at its peak freshness and abundance. This means you can pick and preserve only what you need, avoiding the problem of excess food that often goes to waste. By canning and fermenting the surplus produce, you can extend its shelf life and make the most of your harvest, minimizing food waste and maximizing sustainability.
Cost Savings
Another advantage of urban gardening for food preservation is the potential for cost savings. By growing your own fruits and vegetables, you can significantly reduce your grocery bills. The cost of buying seeds or seedlings and maintaining a garden is often much lower compared to constantly purchasing produce from the supermarket. Additionally, by preserving the excess harvest through canning and fermenting, you can stretch your food budget even further and enjoy your homegrown produce throughout the year.
Improved Food Security
Urban gardening not only promotes self-sufficiency but also contributes to improved food security. By cultivating your own food, you become less reliant on external food sources, reducing the risk of supply chain disruptions or food shortages. This is especially important in urban areas where access to fresh and affordable produce may be limited. By canning and fermenting your garden harvest, you can stock your pantry with preserved foods that will sustain you during times of scarcity or emergencies.
Promotion of Sustainable Living
Urban gardening for food preservation aligns with the principles of sustainable living. By growing your own food, you are reducing the carbon footprint associated with long-distance transportation and packaging of store-bought produce. Additionally, by preserving surplus harvest through canning and fermenting, you are minimizing food waste and utilizing resources efficiently. Urban gardening empowers individuals to take control of their food choices while contributing to the overall goal of building a more sustainable and resilient community.
Introduction to Canning
Definition and Purpose of Canning
Canning is a food preservation technique that involves sealing food in jars and processing them in heat, effectively destroying the microorganisms that cause spoilage. The purpose of canning is to prolong the shelf life of perishable foods, allowing them to be stored for an extended period without refrigeration. Canned foods retain their flavor, texture, and nutritional value, making them a convenient and safe option for long-term storage and consumption.
History of Canning
The practice of canning can be traced back to the early 19th century when Napoleon Bonaparte sought an efficient method of preserving food for his troops. The discovery of the canning process revolutionized the way food was preserved, providing a solution to the problem of food spoilage during long journeys and military campaigns. The method gained popularity and evolved over the years, eventually becoming accessible to households worldwide. Today, canning is not only a practical preservation technique but also a hobby enjoyed by many enthusiasts.
Types of Canned Foods
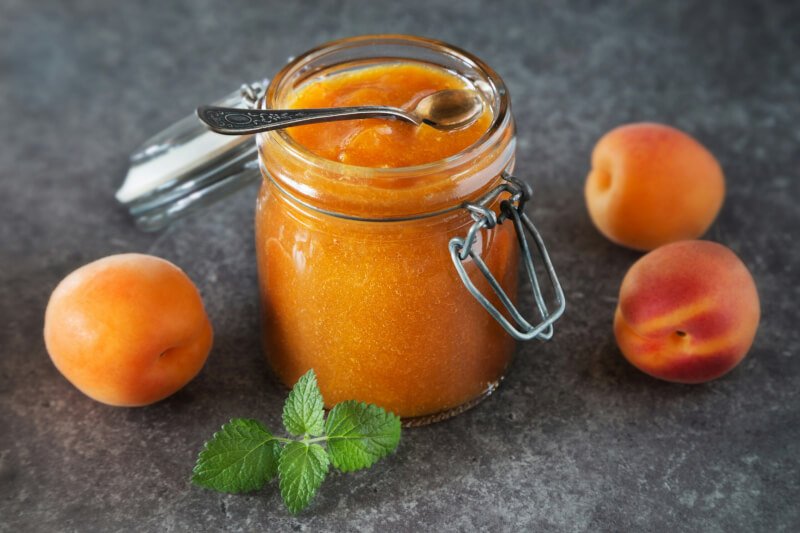
Almost any food can be canned, ranging from fruits and vegetables to meats, fish, and soups. Canning allows you to preserve seasonal produce and enjoy it throughout the year, regardless of the availability in your local market. Some popular examples of canned foods include tomato sauce, pickles, peaches, and green beans. The wide variety of foods that can be safely preserved through canning makes it a versatile and valuable technique for urban gardeners looking to make the most of their harvest.

Equipment and Supplies for Canning
Canning Jars
Canning jars are the primary containers used in the canning process. These jars are specially designed with airtight seals that prevent air from entering and spoilage agents from contaminating the food. They come in various sizes and shapes to accommodate different types of foods and storage needs. Canning jars are typically made of heat-resistant glass and are reusable, making them a cost-effective and eco-friendly option for preserving food.
Lids and Rings
Lids and rings are essential components of canning jars that ensure a secure seal. Lids are flat metal discs with a rubber lining that create a vacuum seal when heated during processing. Rings, also known as bands or screw bands, are metal rings that hold the lids in place during canning. Once the vacuum seal is formed and the jars have cooled, the rings can be removed and reused for future batches. It is important to note that the lids should not be reused as they lose their effectiveness after the initial use.
Water Bath Canner
A water bath canner is a large pot or kettle specifically designed for processing jars in a water bath canning method. It features a fitted rack that holds the canning jars and allows water to circulate evenly around them, ensuring proper heat distribution and sterilization. Water bath canners are typically made of enamel-coated steel or aluminum and are equipped with sturdy handles and a tightly fitting lid. They are an essential tool for safely processing low-acid foods that are preserved using the water bath canning method.
Pressure Canner
A pressure canner is used for processing high-acid and low-acid foods that require higher temperatures for safe preservation. Unlike a water bath canner, a pressure canner can reach temperatures above the boiling point of water, which is necessary to destroy harmful bacteria, such as Clostridium botulinum, that may be present in some low-acid foods. Pressure canners have a locking lid and a pressure regulator that allows for precise control of the internal pressure. They are typically made of heavy-duty materials, such as aluminum or stainless steel, to withstand the high pressures involved.
Canning Methods
Water Bath Canning
Water bath canning is a popular canning method used for preserving high-acid foods, such as fruits, tomatoes, and pickles. This method involves submerging filled jars in a boiling water bath for a specified period. The heat of the boiling water creates a vacuum seal, preventing the growth of spoilage microorganisms and ensuring the safety and longevity of the canned food. Water bath canning is a relatively simple and accessible method, making it an ideal choice for beginners and those without access to a pressure canner.
Pressure Canning
Pressure canning is necessary for preserving low-acid foods, including vegetables, meats, and soups, which require higher temperatures to eliminate the risk of bacterial contamination. This method involves processing filled jars in a specialized pressure canner that can reach and maintain temperatures above the boiling point of water. The high pressure inside the canner allows for the destruction of spores and bacteria that could pose a health risk. Pressure canning requires careful attention to detail and adherence to safety guidelines, making it essential to follow tested recipes and canning instructions.
Open Kettle Canning
Open kettle canning, also known as oven canning, is a method that was historically used for canning high-acid foods. However, it is no longer recommended by food safety experts as it poses a greater risk of spoilage and bacterial contamination. Open kettle canning involves partially cooking the food and then filling the jars with the hot mixture. The jars are sealed with a lid and allowed to cool, creating a vacuum seal. While this method may seem simple and convenient, it does not provide the necessary heat treatment required to safely preserve food for long-term storage. It is important to prioritize safety when preserving food through canning and use approved methods like water bath canning or pressure canning.

Step-by-Step Guide to Water Bath Canning
Preparing the Jars and Lids
Start by inspecting the canning jars for any cracks, chips, or defects. Discard any jars that are damaged as they may compromise the seal. Wash the jars and lids in hot, soapy water, ensuring they are thoroughly cleaned. Rinse the jars and lids with hot water to remove any soap residue. At this stage, you can also sterilize the jars and lids by placing them in a boiling water bath or running them through a dishwasher cycle.
Preparing the Food
Wash and prepare the fruits or vegetables you wish to can. Remove any spoiled or damaged portions and cut them into desirable sizes. Follow a tested recipe to ensure proper proportions and preservation techniques. Some recipes may require blanching or cooking the food before canning. This step helps maintain the quality and texture of the final product.
Filling and Sealing the Jars
Ladle or pack the prepared food into the sterilized jars, leaving the recommended headspace specified in the recipe. Wipe the jar rims with a clean, damp cloth to remove any food residue or particles. Place the lids on top of the jars and secure them with the rings, tightening them until they are just snug. Avoid overtightening, as this can prevent the lids from achieving a proper seal during processing.
Water Bath Processing
Carefully place the filled and sealed jars in the water bath canner, ensuring they are fully submerged. Add enough hot water to the canner to cover the jars by at least one inch. Place the lid on the canner and bring the water to a rolling boil. Follow the recipe’s recommended processing time, adjusting for altitude if necessary. Maintain a steady boil throughout the processing time, adding more hot water if needed to keep the jars covered.
Cooling and Storage
Once the processing time is complete, turn off the heat and carefully remove the jars from the canner using jar lifters. Place the jars on a heat-resistant surface or a towel-lined countertop, allowing them to cool undisturbed for 12 to 24 hours. As the jars cool, you may hear a popping sound, indicating that the lids are sealing. After cooling, check the lids for a concave center, which indicates a successful seal. Any unsealed jars should be refrigerated and consumed promptly. Properly sealed jars can be stored in a cool, dark place for up to a year or as recommended by the recipe.
Step-by-Step Guide to Pressure Canning
Preparing the Jars and Lids
Inspect the jars for flaws, wash them with hot, soapy water, and rinse thoroughly. Sterilize the jars by boiling them in water or running them through a dishwasher cycle. Place the lids in a small saucepan of simmering water to soften the sealing compound. This step ensures a secure seal during pressure canning.
Preparing the Food
Wash, peel, and cut the fruits or vegetables according to the recipe’s specifications. Follow recommended blanching or cooking methods as needed. Proper preparation ensures the food is safe, retains its quality, and maintains the required processing times.
Filling and Sealing the Jars
Using a funnel, carefully fill the sterilized jars with the prepared food, leaving appropriate headspace as stated in the recipe. Remove any air bubbles by running a non-metallic spatula or chopstick between the food and the jar’s sides. Wipe the rims of the jars clean with a damp cloth, ensuring no food particles remain. Place the softened lids on top of the jars and secure them with the rings, tightening until they are just snug.
Pressure Canning Process
Place the filled and sealed jars on the rack inside the pressure canner, ensuring they are elevated off the bottom of the canner. Add the recommended amount of water to the canner, following the manufacturer’s instructions. Lock the lid in place and heat the canner over medium-high heat until it reaches the appropriate pressure for the altitude you are at. Maintain the desired pressure throughout the processing time, adjusting the heat as needed. Follow the recipe’s instructions for the correct processing time for the food being canned.
Cooling and Storage
After the processing time is complete, turn off the heat and allow the pressure canner to cool naturally. Do not attempt to open or remove the canner lid until the pressure has returned to zero and the canner has depressurized completely. Carefully remove the jars from the canner using jar lifters and place them on a heat-resistant surface or towel-lined countertop. Allow the jars to cool undisturbed for 12 to 24 hours. Check the lids for a concave center to ensure proper sealing. Store the properly sealed jars in a cool, dark place for long-term storage, discarding any unsealed jars or refrigerating them for immediate consumption.

Safety Considerations for Canning
Proper Cleaning and Sanitization
Maintaining clean and sanitary conditions throughout the canning process is crucial for food safety. Thoroughly clean all equipment, utensils, and surfaces before starting the canning process. This includes washing and disinfecting the canning jars, lids, rings, and canning tools. Regularly wash your hands and avoid cross-contamination by using separate cutting boards and utensils for raw and cooked foods. Proper cleaning and sanitization practices help prevent the growth of harmful bacteria and ensure the safe preservation of your canned foods.
Testing and Inspecting Jars
Before using jars for canning, it is important to inspect them for cracks, chips, or defects. Damaged jars should not be used as they may compromise the seal or integrity of the canned food. Additionally, it is essential to test the lids to ensure they provide a proper seal. Tin lids should make a distinct “ping” sound when pressed in the center, indicating that a vacuum seal has formed. Flexing the lids should reveal a concave center, further confirming a successful seal. Any jars or lids that do not pass the inspection should not be used for canning.
Correct Use of Canning Equipment
Using canning equipment correctly is crucial for both safety and the effectiveness of the preservation process. Follow the manufacturer’s instructions when using water bath canners and pressure canners, ensuring proper assembly and use. Pay attention to recommended processing times, pressures, and temperatures to ensure adequate preservation and elimination of harmful bacteria. Utilize appropriate tools such as jar lifters and canning funnels to prevent burns and spills. Proper use of canning equipment helps to minimize the risk of accidents and ensures the safety of your preserved foods.
Importance of Following Recipes
When canning, it is essential to follow tested recipes from reputable sources. Recipes from trusted sources have gone through extensive testing to determine the correct proportions, processing times, and techniques for safe and successful canning. Deviating from tested recipes may result in improperly preserved, spoiled, or potentially dangerous food. Be cautious of recipes found online or shared by individuals without proper credentials. It is important to prioritize safety and rely on trusted resources for canning recipes.
Detecting and Addressing Spoiled Canned Foods
While canning is a reliable preservation method, it is important to be vigilant when inspecting canned foods for signs of spoilage. Always examine the jar lids for signs of bulging, leakage, or unsealed jars. Any unusual odor, strange color, or mold growth inside the jar is a clear indication of spoilage. If you suspect that a jar of canned food is spoiled, it is recommended to discard the contents and the jar immediately. Consuming spoiled canned foods can lead to foodborne illnesses, so it is crucial to prioritize food safety.
Introduction to Fermenting
Definition and Purpose of Fermenting
Fermenting is a traditional food preservation technique that involves the breakdown of carbohydrates in food by beneficial bacteria and yeasts. This process creates lactic acid, alcohol, or carbon dioxide, which acts as a natural preservative, inhibiting the growth of harmful bacteria. The purpose of fermenting is to transform raw ingredients into flavorful, nutrient-dense foods with increased shelf life. Fermented foods offer a range of health benefits, including improved digestion, enhanced nutrient absorption, and a well-balanced gut microbiome.
History of Fermentation
Fermentation has been used as a preservation method for thousands of years, dating back to ancient civilizations. Many traditional cultures relied on fermentation to preserve surplus harvests and ensure a year-round food supply. Fermented foods have also played significant cultural roles, celebrated for their flavors and contribution to overall well-being. Today, fermentation continues to be appreciated for its ability to transform ordinary ingredients into extraordinary delights.
Types of Fermented Foods
Fermentation can be applied to a wide range of foods, resulting in a variety of delicious and nutritious fermented products. Some popular examples of fermented foods include sauerkraut, kimchi, yogurt, kefir, kombucha, miso, tempeh, and sourdough bread. Each fermented food possesses its unique flavor profiles, textures, and health benefits. The versatility of fermentation allows for creative experimentation and offers endless opportunities to incorporate fermented foods into your diet.

Equipment and Supplies for Fermenting
Fermentation Vessels
Fermentation vessels are containers specifically designed for the fermentation process. They come in various sizes and materials, such as glass jars, ceramic crocks, or food-grade plastic buckets. When choosing a fermentation vessel, consider the quantity of food you wish to ferment and the type of food you plan to ferment. The vessel should provide enough space for the food to expand during fermentation and be easy to clean and sanitize.
Airlocks
Airlocks are small devices that allow gases produced during fermentation to escape while preventing air and contaminants from entering the fermentation vessel. They typically consist of a plastic or glass chamber filled with water or a sanitizing solution. Airlocks are attached to the fermentation vessel, creating a sealed environment that allows fermentation to occur without the risk of spoilage or contamination. Airlocks are especially useful for long-term fermentation projects or when fermenting in vessels that do not have built-in air-release valves.
Weights
Weights are used to keep the fermented food submerged in its brine or liquid during fermentation. If the food is exposed to the air, it may spoil or become discolored. Weights can be made of various food-grade materials, such as glass, ceramic, or stainless steel. They are placed on top of the food, ensuring that it remains fully submerged in the brine, promoting an anaerobic environment essential for successful fermentation.
Fermentation Lids
Fermentation lids are specialized lids that fit onto wide-mouth canning jars, providing an easy and convenient way to ferment small batches of foods. These lids often feature built-in airlocks or different mechanisms for releasing gases produced during fermentation. They create a sealed environment within the jar, allowing for the buildup of pressure without the need for burping or manual monitoring. Fermentation lids are a popular choice for those new to fermentation or who prefer smaller fermentation batches.
Step-by-Step Guide to Lacto-fermentation
Preparing the Fermentation Vessels
Ensure that the fermentation vessels and all utensils, including weights and airlocks, are thoroughly cleaned and sanitized. Hot, soapy water can be used for the initial cleaning, followed by rinsing and drying. To sanitize, you can use boiling water, a diluted bleach solution, or food-grade sanitizing solutions. It is important to eliminate any potential sources of contamination to avoid spoilage.
Preparing and Packing the Food
Prepare the fruits or vegetables you plan to ferment by washing them thoroughly and removing any bruised or damaged parts. Depending on the recipe, you may need to cut, slice, shred, or leave the produce whole. Some recipes may also call for blanching or salting the produce before fermentation. Pack the prepared food tightly into the fermentation vessel, leaving a couple of inches of headspace at the top.
Adding Salt Brine
Prepare a salt brine solution by dissolving the appropriate amount of salt in filtered water. The concentration of the brine will vary depending on the recipe and desired flavor. Pour the salt brine over the packed food, ensuring that it completely covers the produce. The brine acts as a natural preservative and creates an environment favoring the growth of beneficial bacteria while inhibiting the growth of harmful bacteria.
Fermentation Process
Once the food is submerged and the vessel is securely sealed, place the fermentation vessel in a cool, dark location with a stable temperature. The desired temperature will vary depending on the recipe and the specific type of fermentation. Fermentation times can range from a few days to several months, depending on factors such as the type of food, ambient temperature, and desired flavor. During fermentation, gases will be released, and you may notice bubbling or slight pressure buildup in the vessel.
Storage and Aging
After the desired fermentation period, carefully remove any weights or airlocks, and taste the fermented food to assess its flavor and texture. If the fermentation is to your liking, transfer the fermented food to clean, airtight containers, such as glass jars with lids. Store the containers in the refrigerator or other cool storage areas to slow down the fermentation process and extend the shelf life. Fermented foods often develop more complex flavors with aging, so allowing them to mature for a period before consumption can enhance their taste.
In conclusion, urban gardening can provide numerous benefits for food preservation. By having access to fresh, organic produce from your own garden, you can reduce food waste, save money, improve food security, and promote sustainable living. When it comes to preserving your garden harvest, canning and fermenting are two popular and effective methods. Canning, whether through water bath or pressure canning, allows you to enjoy the flavors of your garden throughout the year. Fermenting, on the other hand, offers the opportunity to transform raw ingredients into flavorful and nutrient-dense foods, providing various health benefits. With the right equipment, supplies, and safety considerations, you can successfully preserve your urban garden harvest and enjoy the rewards of your labor all year round.

