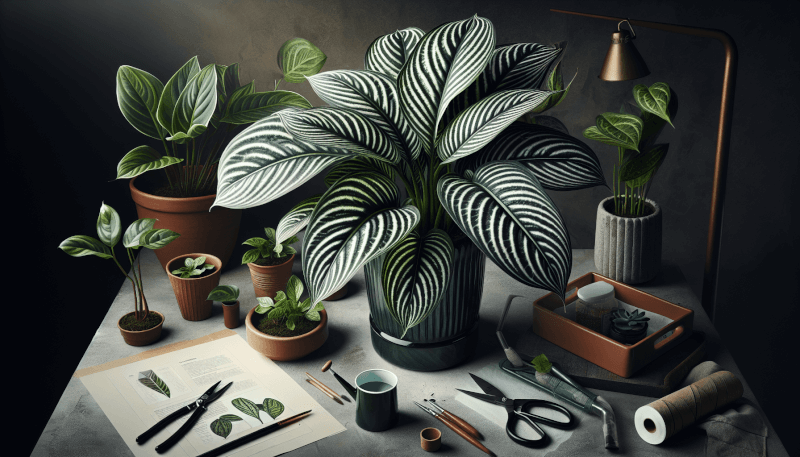
Are you looking to add a touch of trendy elegance to your indoor space? Look no further than the captivating Pinstripe Plant. With its striking dark green leaves adorned with delicate white veins, this plant is a must-have for any plant lover. But how do you ensure that your Pinstripe Plant thrives and flourishes? In this article, we will guide you through the basics of Pinstripe Plant care, from ideal lighting conditions to watering and fertilization tips. Get ready to enhance your green thumb and create a stunning display with this versatile and visually stunning plant.
Choosing the Right Location
Indoor vs Outdoor
When it comes to choosing the right location for your pinstripe plant, one of the first decisions you’ll need to make is whether to keep it indoors or outdoors. Indoors, the plant can thrive in pots or hanging baskets, making it a versatile option for any room in your home. It prefers bright, indirect light, making it suitable for areas like living rooms or bedrooms where it can receive ample but filtered sunlight.
If you choose to grow your pinstripe plant outdoors, it’s important to find a spot that provides partial shade. Too much direct sunlight can scorch the leaves, so finding a spot with dappled light or morning sun and afternoon shade is ideal. Just be sure to protect it from strong winds and extreme temperatures, as the pinstripe plant prefers more stable conditions.
Light Requirements
When it comes to light, the pinstripe plant thrives in bright, indirect light conditions. In an indoor setting, placing your plant near a north or east-facing window is typically the best choice, as it provides gentle and filtered light. Avoid placing it in direct sunlight, as this can cause the leaves to fade and scorch.
If you’re choosing to grow your pinstripe plant outdoors, finding a spot with partial shade is key. Underneath a tall tree or near a wall that provides some shade during the hottest parts of the day can offer the perfect light conditions for this striking plant.
Temperature and Humidity
The pinstripe plant thrives in temperatures ranging between 65-80°F (18-27°C). It’s important to keep the plant away from drafts, as sudden temperature fluctuations can cause stress and leaf damage. If you’re growing your pinstripe plant outdoors, be aware of any sudden drops in temperature and protect your plant accordingly.
In terms of humidity, the pinstripe plant prefers a moderate to high humidity environment. If you’re growing it indoors, consider using a humidifier or placing the plant on a tray filled with water and pebbles to increase the humidity level around it. Outdoors, the plant can benefit from the natural humidity in the air, but be mindful of dry spells or low humidity regions and provide additional moisture when needed.
Watering and Moisture
Watering Frequency
Proper watering is crucial for the health of your pinstripe plant. It is important to find the right balance, as overwatering can lead to root rot, while underwatering can cause stress and parched leaves.
Water your pinstripe plant when the top inch of soil feels dry to the touch. Stick your finger into the soil and check if it feels moist or dry. If it feels dry, it’s time to water. However, remember to avoid letting the plant sit in standing water, as it can lead to root rot. Always allow excess water to drain out from the bottom of the pot or container.
Proper Drainage
Speaking of drainage, one of the most important aspects of pinstripe plant care is ensuring proper drainage. Make sure the pot or container you choose has drainage holes at the bottom. This allows excess water to escape, preventing the soil from becoming waterlogged and causing harm to the roots.
If you’re growing your pinstripe plant outdoors, choose a spot in your garden or yard that has well-draining soil. This will help prevent water from pooling around the roots, reducing the risk of root rot and other water-related issues.
Humidity Needs
As mentioned earlier, the pinstripe plant prefers moderate to high humidity. If you’re growing it indoors, you can increase the humidity around the plant by misting it regularly with water. Alternatively, placing a small humidifier in the room can help create the ideal humidity levels for your pinstripe plant.
Outdoors, the plant can benefit from the natural humidity in the air. However, if you live in a dry climate or during particularly dry seasons, you may need to supplement the humidity by misting the plant or providing it with a humid microclimate, like placing it near a water feature or grouping it with other plants to create a more humid environment.

Soil Requirements
Well-draining Soil
The pinstripe plant thrives in well-draining soil, meaning the water should not sit around the roots. When choosing a potting mix, opt for one that is specifically formulated for houseplants or choose a mixture that includes a combination of peat moss, perlite, and sand. These components help create a loose and well-aerated soil structure, ideal for your pinstripe plant’s roots to breathe and grow.
Using Peat Moss or Perlite
When preparing the soil for your pinstripe plant, incorporating peat moss or perlite can greatly improve its drainage and moisture retention abilities. Peat moss, in particular, helps retain moisture without causing waterlogging, ensuring that the plant’s roots stay healthy and hydrated.
Perlite, on the other hand, aids in soil aeration and drainage. The little white balls of perlite help create air pockets within the soil, preventing compaction and allowing excess water to drain away. Mixing peat moss or perlite with your potting mix can create the perfect soil consistency for your pinstripe plant.
Avoiding Wet Feet
The pinstripe plant does not tolerate soggy or waterlogged soil. When watering your plant, always allow excess water to drain out freely from the bottom of the pot. Avoid letting your pinstripe plant sit in a saucer filled with water as this can lead to root rot.
If you notice that the soil is consistently staying too wet or damp, consider repotting your plant in fresh, well-draining soil. This will ensure that your pinstripe plant’s roots have a healthy environment to thrive in.
Fertilizing
Choosing the Right Fertilizer
To keep your pinstripe plant healthy and vibrant, it’s important to provide it with proper nutrients. When it comes to fertilizing, opt for a balanced, water-soluble fertilizer specifically formulated for houseplants. Look for an NPK ratio of 20-20-20 or 10-10-10, which indicates the proportions of nitrogen, phosphorus, and potassium in the fertilizer.
Another option is to use organic fertilizers, such as compost or worm castings, which can enrich the soil and provide slow-release nutrients over time. These organic options are gentle on the plant and promote long-term soil health.
Frequency of Fertilization
During the growing season, which typically spans spring and summer, you can fertilize your pinstripe plant once a month. Dilute the fertilizer according to the package instructions and apply it to the soil, making sure to avoid direct contact with the leaves.
During the dormant season, which is usually fall and winter, reduce the frequency of fertilization to once every two to three months. This allows the plant to rest and conserve energy during its natural growth cycle.
Avoiding Over-Fertilization
While providing nutrients to your pinstripe plant is important, it’s equally crucial to avoid over-fertilization. Too much fertilizer can lead to a buildup of salts in the soil, damaging the plant’s roots and causing leaf burn.
Always follow the recommended dosage instructions on the fertilizer package and err on the side of caution, using a slightly weaker solution if in doubt. Also, remember to flush the soil occasionally with plain water to remove any excess salts that may have built up over time.

Pruning and Trimming
Removing Dead or Yellow Leaves
Regular pruning and trimming play a vital role in maintaining the health and appearance of your pinstripe plant. By removing dead or yellowing leaves, you help redirect the plant’s energy towards healthy growth. Use clean, sharp scissors or pruning shears to carefully cut off any damaged or diseased leaves at their base.
Removing spent flowers and trimming back leggy stems can also encourage new growth and a more compact plant shape. Just be sure not to remove more than one-third of the plant at a time, as this can cause undue stress.
Maintaining Compact Growth
If your pinstripe plant starts to grow long, straggly stems, you can encourage a more compact growth habit by pinching or cutting back the stem tips. This promotes branching and results in a bushier, more densely foliage plant.
When trimming, always make your cuts just above a leaf node or at a junction where a leaf stem meets the main stem. This allows for new growth to emerge and helps maintain a well-proportioned plant shape.
Encouraging Bushier Growth
To encourage bushier growth in your pinstripe plant, consider pruning the main stem in the early stages of growth. By cutting back the main stem, the plant will redirect its energy towards lateral shoots, resulting in a fuller and more bushy appearance. Make the cut just above a set of healthy leaves to ensure a clean and successful pruning.
Remember to prune and trim your pinstripe plant regularly to maintain its overall health and appearance. It’s always best to remove any dead or dying foliage as soon as you notice it to prevent the spread of disease and to keep your plant looking lush and vibrant.
Support and Stake
Using Stakes for Support
In some cases, your pinstripe plant may require additional support to keep it upright. If your plant’s stems are long and leggy, or if it has a tendency to flop over, using stakes can provide the necessary support. Choose stakes that are tall enough to reach the desired height and insert them into the soil near the base of the plant.
As the plant grows, gently tie the stems to the stakes using soft plant ties or twine. Be careful not to tie the stems too tightly to allow for growth and movement. This will help keep your pinstripe plant upright and prevent any potential damage.
Tying the Plant Gently
When tying your pinstripe plant to stakes or other support structures, it’s important to do so gently. Avoid using materials that can cut into the stems or cause damage. Soft plant ties, twine, or fabric strips are ideal options as they are gentle and won’t harm the plant.
As you tie the stems to the supports, do so loosely to allow for some movement and growth. The ties should provide support without restricting the plant’s natural development. Regularly check the ties to ensure they aren’t becoming too tight and adjust them as necessary.
Avoiding Damage to Plant
When using stakes or other support structures for your pinstripe plant, take care to avoid causing any damage. Insert the stakes into the soil at an angle, being cautious not to pierce the roots or stem. Use gentle ties that won’t constrict or cut into the plant, and regularly inspect the ties and stakes to ensure they’re still secure and functioning properly.
By providing proper support and being mindful of potential damage, you can help your pinstripe plant grow upright and maintain its stunning appearance.
Pest and Disease Control
Identifying Common Pests
Despite your best efforts, pests may occasionally find their way to your pinstripe plant. Common pests that can affect this plant include aphids, mealybugs, spider mites, and scale insects. These pests can cause damage by sucking sap from the leaves, resulting in stunted growth, yellowing leaves, and overall decline.
Inspect your pinstripe plant regularly for signs of pests, such as tiny insects, sticky residue on the leaves, or curled and distorted foliage. If you notice any of these signs, it’s important to take action promptly to prevent a severe infestation.
Using Natural Pest Control Methods
When it comes to pest control for your pinstripe plant, it’s best to opt for natural and organic methods. Many pests can be effectively controlled using simple solutions such as insecticidal soap or a mixture of water and mild dish soap. Dilute the soap in water according to the package instructions or mix 1-2 teaspoons of dish soap with a quart of water, and spray the solution onto the affected areas of the plant.
Another natural pest control method is introducing beneficial insects, such as ladybugs or lacewings, which feed on common garden pests. You can purchase these insects from garden centers or online suppliers and release them onto your pinstripe plant.
Preventing and Treating Diseases
In addition to pests, pinstripe plants can also be susceptible to diseases such as root rot, leaf spot, or powdery mildew. To prevent these diseases, it’s important to provide proper care, including adequate drainage, proper watering, and good air circulation.
If your plant does develop a disease, it’s crucial to take action promptly. Remove any affected leaves or areas of the plant, and treat the remaining healthy parts with a suitable fungicide or anti-fungal spray, following the instructions on the product’s label. Ensure that the infected plant material is disposed of properly to prevent the disease from spreading.
Regularly monitoring your pinstripe plant for pests and diseases and taking prompt action when necessary will help keep your plant healthy and thriving.
Propagation
Propagating from Stem Cuttings
If you want to expand your pinstripe plant collection or share it with others, propagation from stem cuttings is a simple and effective method. Choose a healthy stem with multiple nodes and make a clean cut just below a leaf node using sharp, sterilized pruning shears or scissors.
Remove the lower leaves, leaving only a few at the top, and dip the cut end into rooting hormone to stimulate root development. Plant the cutting into a small container with well-draining soil, and keep it in a warm, humid environment. Mist the cutting regularly to maintain moisture levels and avoid direct sunlight until roots have formed.
Using Rooting Hormone
Rooting hormone can be a helpful tool when propagating your pinstripe plant. It contains synthetic or naturally occurring growth hormones that stimulate root development in cuttings. Simply dip the cut end of the stem into the rooting hormone powder or gel before planting it in the soil.
While rooting hormone can increase the success rate of propagation, it’s not essential for the process. Pinstripe plants can still root and grow successfully without the use of rooting hormone.
Providing Optimal Conditions for Propagation
To ensure successful propagation, providing optimal conditions is essential. Keep the cuttings in a warm and humid environment to encourage root growth. You can create a mini greenhouse effect by covering the container with a clear plastic bag or using a propagating tray with a humidity dome.
Maintain consistent moisture levels by misting the cuttings regularly or lightly watering the soil when it starts to dry out. Avoid overwatering, as excessive moisture can lead to rot or fungal issues. Place the container in an area with bright, indirect light, but avoid direct sunlight, as it can scorch the cuttings.
With proper care and attention, your pinstripe plant cuttings should start developing roots within a few weeks. Once the roots have established, you can transplant them into larger pots or share them with fellow plant enthusiasts.
Repotting and Transplanting
When to Repot
Your pinstripe plant will eventually outgrow its current pot and require repotting. Look for signs that the plant has become root-bound, such as roots growing out of the drainage holes or a decreased growth rate. Additionally, if you notice that the plant is drying out more quickly than usual or if fertilizers are getting absorbed faster, it may be an indication that the plant needs more space.
The best time to repot your pinstripe plant is during the active growing season, typically in spring or early summer. This allows the plant to recover from any minor root disturbance and grow into its new container successfully.
Choosing the Right Pot
When selecting a new pot for your pinstripe plant, opt for one that is slightly larger than its current container. Choose a pot with drainage holes at the bottom to ensure proper water drainage and prevent waterlogging.
Consider the material of the pot as well. Terracotta or clay pots are good options as they provide more breathability for the roots. However, keep in mind that these pots can also dry out faster, so you may need to adjust your watering routine accordingly. Alternatively, plastic or ceramic pots can also work well for pinstripe plants.
Providing Proper Drainage
Proper drainage is crucial for the health of your pinstripe plant, and it’s especially important when repotting. Ensure that the new pot has drainage holes at the bottom to allow excess water to escape. Covering the drainage holes with pieces of broken pottery or a layer of small stones can help prevent soil from clogging the holes.
When repotting, place a layer of well-draining soil at the bottom of the pot before carefully transferring the plant. Gently tease the roots apart to encourage healthy growth and fill the remaining space with fresh potting mix. After repotting, water the plant thoroughly and allow any excess water to drain away.
Common Mistakes to Avoid
Overwatering
One of the most common mistakes when caring for pinstripe plants is overwatering. These plants prefer well-draining soil, and excessive moisture can quickly lead to root rot. Avoid watering too frequently or allowing the plant to sit in standing water. Always check the soil moisture before watering and adjust the frequency based on the plant’s needs and environmental conditions.
Insufficient Light
Another common mistake is providing insufficient light for the pinstripe plant. While it prefers bright, indirect light, too little light can lead to weak growth and dull foliage. Ensure that your plant is placed in a spot where it can receive adequate brightness without being exposed to direct sunlight, which can cause leaf burn. Monitor the light levels and adjust the placement of your pinstripe plant accordingly.
Ignoring Pest Infestations
Pest infestations can quickly deteriorate the health of your pinstripe plant if not addressed promptly. Regularly inspect your plant for signs of pests and take action as soon as you notice any issues. Ignoring or delaying treatment can allow pests to multiply and cause extensive damage to your plant. Take a proactive approach by monitoring your pinstripe plant regularly and implementing natural pest control methods when needed.
By avoiding these common mistakes and following the care guidelines outlined in this article, you’ll be well on your way to maintaining a happy and thriving pinstripe plant. Enjoy the beauty of its unique foliage and continue to provide the care it needs to flourish in your home or garden.
