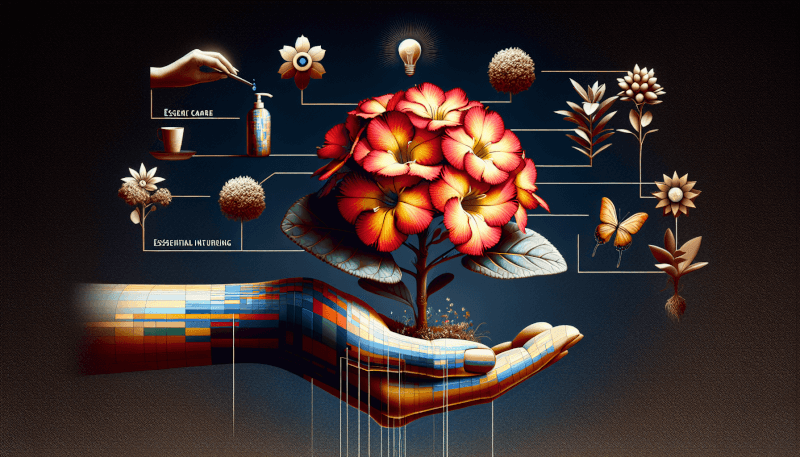
Are you interested in learning how to care for a Calandiva plant? Look no further! In this article, we will guide you through the essential steps to ensure your Calandiva plant thrives and blooms beautifully. From watering and sunlight requirements to pruning and fertilizing tips, we’ve got you covered. Whether you’re a seasoned plant parent or just starting your green thumb journey, this article is packed with friendly advice to help you care for your Calandiva plant and enjoy its vibrant and long-lasting flowers.

Choosing the Right Location
Proper Light Conditions
When it comes to being a responsible plant parent to your Calandiva, choosing the right location is crucial. The Calandiva thrives in bright, indirect light, making it an ideal houseplant. Find a spot in your home that receives ample natural light but is not exposed to direct sunlight. Placing your Calandiva near a north or east-facing window is a great option. This way, your plant can soak in the gentle morning sunlight without being scorched by the intense afternoon rays.
Temperature
Calandiva plants prefer moderate temperatures, around 65-75°F (18-24°C). Keep your plant away from drafts or excessively hot areas such as radiators or air conditioning vents. These temperature extremes can cause stress to your Calandiva and hinder its growth and flowering potential. Maintaining a consistent temperature within the ideal range will help your plant thrive.
Humidity
The Calandiva does well in average household humidity levels, which usually range from 40-60%. However, if you live in an area with dry air or during the winter when indoor humidity drops, providing some extra moisture can be beneficial. You can increase humidity around your Calandiva by grouping it with other plants or using a humidifier. Alternatively, misting the leaves gently once or twice a week can also help create a more humid environment for your plant.
Watering
Watering Frequency
Watering your Calandiva correctly is essential for its overall health and longevity. The frequency of watering largely depends on the season and environmental conditions. As a general rule of thumb, allow the top inch of the soil to dry out before watering again. Stick your finger into the soil, and if it feels dry at that depth, it’s time to water your Calandiva. Avoid overwatering, as it can lead to root rot and other water-related issues.
Watering Technique
When watering your Calandiva, aim to provide a thorough soak. Take your plant to the sink or a drainage saucer and water it until water starts to flow from the drainage holes. Allow the excess water to drain completely before returning your plant to its display location. This ensures that the roots receive proper hydration without sitting in standing water, which can lead to root rot.
Avoiding Overwatering
Overwatering is one of the most common mistakes people make when caring for their Calandiva. To avoid it, refrain from watering your plant on a strict schedule. Instead, monitor the moisture levels in the soil and adjust the frequency accordingly. Factors such as humidity, temperature, and pot size can affect how quickly your Calandiva dries out. Additionally, always use well-draining soil and pots with drainage holes to prevent water from accumulating around the roots.
Feeding
Fertilizer Type
Proper feeding is essential for your Calandiva’s growth and flowering. Use a balanced, water-soluble fertilizer formulated for flowering plants. Look for a fertilizer with an N-P-K ratio of around 10-10-10 or 14-14-14. These numbers represent the percentages of nitrogen, phosphorus, and potassium, respectively. The balanced ratio ensures that your Calandiva receives the necessary nutrients to maintain its health and produce vibrant blooms.
Feeding Schedule
During the growing season, feed your Calandiva with a diluted fertilizer solution once every two weeks. Follow the instructions on the fertilizer packaging for the appropriate dilution ratio. Adjust the feeding schedule if your plant shows signs of overfertilization, such as yellowing leaves or stunted growth. Remember to reduce feeding during the dormant period, usually in late fall and winter, as your plant’s growth slows down.
Amount of Fertilizer
When fertilizing your Calandiva, it’s important not to exceed the recommended amount. Overfertilizing can lead to fertilizer burn and cause harm to your plant. A little goes a long way, so be conservative with your application. It’s better to under-fertilize slightly than risk overdoing it. Dilute the fertilizer according to the package instructions, and if in doubt, err on the side of caution. Your Calandiva will appreciate a balanced and measured approach to feeding.

Pruning and Deadheading
Pruning to Promote Bushier Growth
Pruning your Calandiva can help maintain its shape and encourage bushier growth. To prune, simply pinch off the tips of leggy stems or those that appear straggly. This encourages new growth from the base, resulting in a more compact and aesthetically pleasing plant. Additionally, removing any yellowing or damaged leaves also improves the overall appearance of your Calandiva.
Deadheading to Encourage Blooming
Deadheading is the practice of removing spent flowers to encourage your Calandiva to produce more blooms. After the flowers fade and wilt, snip them off just above a set of leaves or a node. This process prevents the plant from using its energy to produce seeds and redirects it towards creating more flowers. Regular deadheading throughout the blooming season keeps your Calandiva looking fresh and vibrant.
Trimming for Maintenance
If your Calandiva starts to grow unruly or out of control, a light trim can help maintain its shape. Trim back any excessively long or leggy stems to promote a more compact growth habit. Be sure to use clean and sharp pruning shears to avoid damaging the plant. Regular trimming promotes a bushier Calandiva and prevents it from becoming too lanky or top-heavy.
Pest and Disease Control
Common Pests
While Calandivas are generally hardy, they can still fall victim to a few common pests. Keep an eye out for aphids, mealybugs, and spider mites. These pests can cause damage by sucking the sap from your Calandiva’s leaves, resulting in wilting and discoloration. Inspect your plant regularly, especially the undersides of leaves and the stems, for any signs of infestation. If you spot any pests, treat them promptly to prevent further damage.
Common Diseases
Calandivas are generally resilient to diseases, but they can occasionally develop issues such as powdery mildew or root rot. Powdery mildew appears as a grayish-white powdery substance on the leaves, while root rot causes the roots to become mushy and black. These issues can arise from overwatering or poor air circulation. Catching the signs early and taking corrective action is essential to prevent the spread of diseases and preserve the health of your Calandiva.
Prevention and Treatment
To prevent pest infestations and diseases, maintain good plant hygiene and provide suitable growing conditions. Ensure proper air circulation around your Calandiva, as stagnant air can contribute to the development of diseases. If you notice any pests or signs of diseases, isolate the affected plant immediately and treat it accordingly. You can use organic insecticidal soap or neem oil for pests and fungicides for diseases, following the product instructions carefully. Regularly inspecting and caring for your Calandiva helps prevent and address these common issues effectively.
Repotting
Signs for Repotting
Knowing when to repot your Calandiva is crucial for its healthy growth. Look for the following signs indicating it’s time to repot: roots visibly emerging from the drainage holes, significant stunting of growth despite proper care, or soil that dries out too quickly after watering. Repotting every 1-2 years, preferably in the spring, allows your Calandiva to have fresh soil and sufficient space for its roots to grow.
Choosing the Right Pot
When selecting a new pot for your Calandiva, choose one with drainage holes to prevent waterlogging. Opt for a pot that is approximately 1-2 inches larger in diameter than your current pot. This size upgrade gives your Calandiva room to grow without overwhelming it. Also, consider using a pot with a slightly heavier base or shape to provide stability, especially if your plant tends to become top-heavy.
Repotting Process
To repot your Calandiva, gently remove it from its current pot, taking care not to damage the roots. Gently shake off excess soil and inspect the roots for any signs of damage or rot. Place your plant in the new pot and fill it partially with fresh, well-draining soil. Carefully position the roots and add more soil until the pot is filled. Give your Calandiva a thorough watering after repotting to help settle the soil. Allow the plant to acclimate to its new home, ensuring it receives appropriate light and water during this transition phase.
Propagation
From Seeds
While Calandivas can be propagated from seeds, it is a more time-consuming and unpredictable method. If you’re up for the challenge, collect seeds from dried flowers and plant them in a suitable seed-starting mix. Keep the soil moist and provide warmth and bright light. It may take several weeks or even months for the seeds to germinate, and not all may be viable. Patience and consistency are key when propagating Calandivas from seeds.
From Stem Cuttings
Propagating your Calandiva from stem cuttings is a reliable and straightforward method. Select a healthy stem with a few leaves, preferably without flowers. Using clean and sharp scissors or shears, make a diagonal cut just below a leaf node. Remove the leaves from the lower half of the cutting, leaving a few at the top. Dip the cut end in rooting hormone if desired, then insert it into a well-draining potting mix. Provide adequate moisture and warmth, and within a few weeks, you should see roots forming. Once the roots are well-established, you can transfer the new Calandiva plant to a larger pot.
From Division
Division is another method to propagate your Calandiva, especially if you have a mature plant with multiple stems. Gently remove the plant from its pot and separate the root system into smaller sections. Ensure that each section has its own stems and roots. Replant the divided sections in separate pots, using well-draining soil. Water thoroughly and provide appropriate care to encourage their growth. Division is an excellent way to create more Calandiva plants and share them with fellow plant enthusiasts.
Support and Staking
Using Supportive Structures
As your Calandiva grows, it may require additional support to stay upright and avoid collapsing under its weight. Consider using supportive structures such as bamboo stakes or decorative plant cages. These structures provide stability and ensure that your beautiful Calandiva remains upright and showcased in all its glory. Choose stakes or cages that are the appropriate height and can be easily adjusted as your plant grows.
Tying and Staking Techniques
When it comes to tying and staking your Calandiva, it’s important to do so gently and securely. Use soft plant ties or string to loosely fasten the stems to the stakes or cages. Avoid tying too tightly, as this can cause damage. Allow your plant some room for natural movement while providing sufficient support to prevent toppling or bending of the stems. Regularly check the ties and adjust them as needed to accommodate the growth of your Calandiva.
Preventing Damage
Supporting and staking your Calandiva helps prevent damage from broken or bent stems. It ensures that the plant maintains an upright and aesthetically pleasing appearance. Additionally, providing support can also help distribute the weight more evenly, reducing the risk of your Calandiva leaning or toppling over. As your plant grows and produces new shoots, be proactive in maintaining the integrity and beauty of your Calandiva by offering the necessary support.
Dealing with Seasonal Changes
Winter Care
During the winter months, your Calandiva may experience a period of dormancy. This is a natural response to the shorter days and cooler temperatures. Reduce the frequency of watering, allowing the top inch of soil to dry out more between waterings. Keep your Calandiva in a location where it still receives bright, indirect light. Avoid subjecting it to extreme temperature fluctuations or drafts. With proper care, your Calandiva will survive the winter and be ready to thrive again in the spring.
Summer Care
In the summer, your Calandiva may experience more rapid growth and increased water needs. Monitor the soil moisture levels closely and adjust your watering schedule accordingly. Provide your plant with ample indirect sunlight, but avoid placing it in intense, direct sunlight, as it can scorch the leaves. If outdoor temperatures become extremely hot, consider providing shade or moving your Calandiva indoors temporarily to prevent heat stress.
Transitioning between Seasons
As the seasons change, your Calandiva may need time to adjust to new environmental conditions. Gradually acclimate your plant to any significant changes in temperature, light exposure, or humidity. Sudden shifts can shock your Calandiva and disrupt its growth patterns. Slowly introduce it to the new conditions over a period of several days or weeks, monitoring its response and making any necessary adjustments to ensure a smooth transition.
Common Calandiva Varieties
Calandiva Pink
Calandiva Pink is a popular variety known for its stunning pink flowers that bloom abundantly. This vibrant color adds a splash of joy and charm to any indoor space. With its compact growth habit and easy care requirements, Calandiva Pink is an excellent choice for both beginner and experienced plant enthusiasts alike. Enjoy the beauty of this variety as it continuously produces a profusion of gorgeous pink blooms.
Calandiva Orange
Calandiva Orange is another captivating variety that captures attention with its vibrant and fiery orange blooms. This bold color brings warmth and energy to any room, making it an excellent choice for adding a pop of color to your indoor garden. With proper care, Calandiva Orange rewards you with an abundance of captivating flowers, transforming any space into a lively and inviting oasis.
Calandiva Red
Calandiva Red is a classic variety loved for its rich and deep red flowers. The elegant blooms stand out against the lush green foliage, creating a striking contrast that captivates the eye. Whether placed on a windowsill or as a centerpiece on a coffee table, Calandiva Red adds a touch of sophistication and natural beauty to any room. Embrace the allure of this variety and indulge in the timeless elegance of its velvety red flowers.
In conclusion, caring for your Calandiva plant involves thoughtful attention to its environmental needs, watering routine, feeding schedule, pruning techniques, pest and disease management, and other essential aspects. By choosing the right location with proper light conditions, maintaining the ideal temperature and humidity, watering correctly, feeding appropriately, pruning and deadheading conscientiously, implementing pest and disease control measures, repotting as needed, propagating effectively, providing support and staking when necessary, and adapting to seasonal changes, you can ensure that your Calandiva thrives and flourishes. With its captivating colors and beautiful blooms, the Calandiva brings joy and vibrancy to any space, rewarding you with its gorgeous display of nature’s wonders. So go ahead, embrace the wonderful world of Calandiva plant care and enjoy the fulfilling experience of nurturing this stunning plant.
